.png?width=200&height=100&name=FJ%20white%20colour%20(400%20x%20200%20px).png)
Shift filtering allows you to focus your dashboard data on a specific working period. Use it to compare Day shift performance against Night shift, analyse weekend production in isolation, or build dedicated dashboards for each shift team.
Filter a dashboard widget by shift
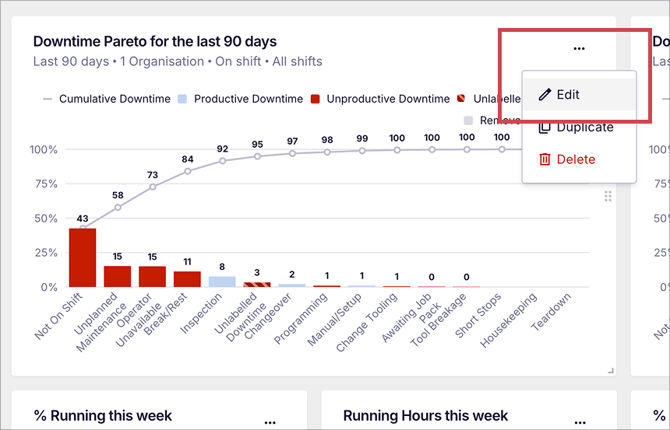
1. On your Dashboard, locate the widget you want to filter.
2. Click the ... icon in the top right corner of the widget > Select Edit.
3. Under the Shifts filter, select the shift category you want to display. By default, widgets show data across all shifts.
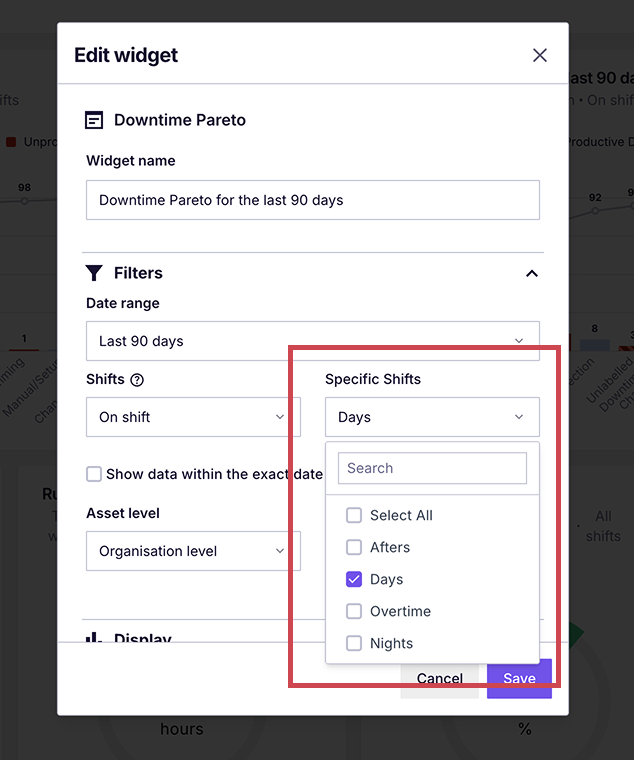
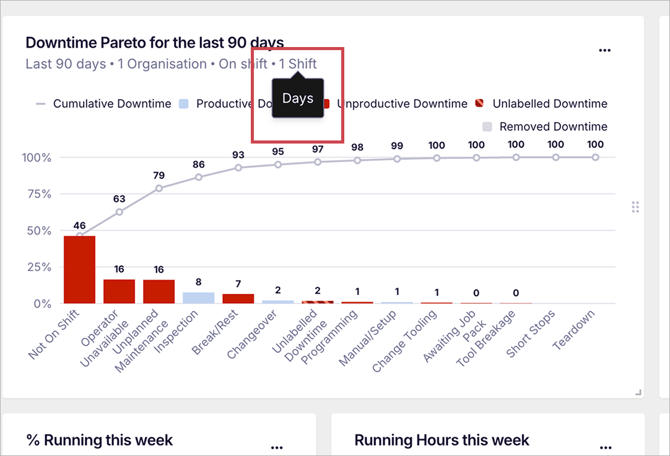
4. Click Save. The widget will now display data for the selected shift only.
Common ways to use shift filtering
- Day shift vs. night shift utilisation — Compare performance across shifts to identify whether one consistently outperforms the other.
- Weekend production analysis — Isolate weekend shifts to understand how weekend performance compares to weekday output.
- Shift-specific downtime — Filter your downtime widget to a single shift to identify whether certain downtime reasons cluster at particular times.
- Team dashboards — Build a separate dashboard for each shift team, showing only their relevant data.
.png?width=670&height=344&name=Frame%20389%20(2).png)
Understanding how shift filtering works with date ranges
It is worth understanding how FourJaw determines which data to include when you combine a shift filter with a date range — particularly if you have shifts that cross midnight.
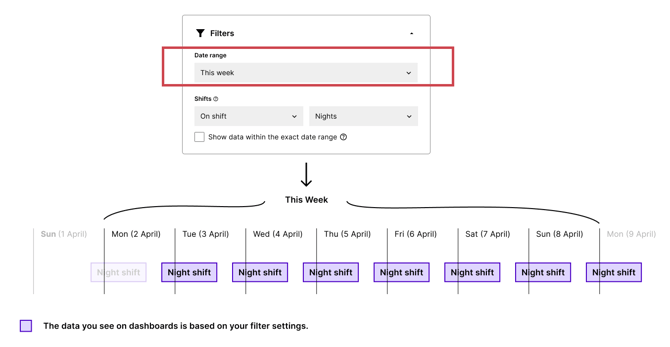
The rule is simple: a shift is included when it started within your selected date or time range. The end time does not factor in.
For example, if your date range is set to This Week (Monday to Sunday), a Night shift that started on the previous Sunday will not be included — even though it was still running into this Monday morning. This is because the shift started outside your selected date range. However, a Night shift starting on this Sunday will be included, as its start time falls within the selected range.
Note: If you want to monitor tonight's Night shift on your dashboard, the fixed "Today" will not capture it correctly once the clock passes midnight, as the shift started yesterday. Use 'Last 24' hours to ensure the date range rolls continuously through the shifts that cross midnight.

Using an exact date range
If you want to show all data that occurred within specific date and time ranges, rather than everything that started within a date range, select “Show data within the exact date range” in the widget settings.
With this option enabled, the widget includes all data from midnight at the start of your selected period to midnight at the end, regardless of when each shift began. For example, if your date range is Monday to Friday, you will see everything that occurred within those five days, including a the part of Sunday Night shift that ran into Monday morning.
Uncheck the box when you want complete shift records. Use exact date range when you need strict calendar accuracy, for example, when you require exactly one full week of data with no overlap from the previous week.